Installation
To be able to sign our git commits on Macos we have to install gnupg and pinentry-mac.
When installing gnupg a pinentry is provided but we want to use a pinentry that is specific för MacOS so we can use the Key-chain to store our Passphrase.
First install gnupg, later on we will install pinentry-mac too.
$ brew install gnupg
Generate a key
First we have to generate a key that we will use. If you already have a key that you want to use when signing commits, jump over this step.
Let’s generate our first key. Use RSA and a key size of 4096, and no expiration date. Remember to choose a strong pass-phrase and your real name and e-mail address.
$ gpg --full-generate-key
gpg (GnuPG) 2.2.13; Copyright (C) 2019 Free Software Foundation, Inc.
This is free software: you are free to change and redistribute it.
There is NO WARRANTY, to the extent permitted by law.


Please select what kind of key you want:
   (1) RSA and RSA (default)
   (2) DSA and Elgamal
   (3) DSA (sign only)
   (4) RSA (sign only)
Your selection? 1
RSA keys may be between 1024 and 4096 bits long.
What keysize do you want? (2048) 4096
Requested keysize is 4096 bits
Please specify how long the key should be valid.
         0 = key does not expire
      <n>  = key expires in n days
      <n>w = key expires in n weeks
      <n>m = key expires in n months
      <n>y = key expires in n years
Key is valid for? (0) 0
Key does not expire at all
Is this correct? (y/N) y


GnuPG needs to construct a user ID to identify your key.


Real name: Homer Simpson
Email address: homer@simpson.com
Comment:
You selected this USER-ID:
    "Homer Simpson <homer@simpson.com>"


Change (N)ame, (C)omment, (E)mail or (O)kay/(Q)uit? O
We need to generate a lot of random bytes. It is a good idea to perform
some other action (type on the keyboard, move the mouse, utilize the
disks) during the prime generation; this gives the random number
generator a better chance to gain enough entropy.
We need to generate a lot of random bytes. It is a good idea to perform
some other action (type on the keyboard, move the mouse, utilize the
disks) during the prime generation; this gives the random number
generator a better chance to gain enough entropy.
gpg: /Users/peter/.gnupg/trustdb.gpg: trustdb created
gpg: key F27366682E13876D marked as ultimately trusted
gpg: directory '/Users/peter/.gnupg/openpgp-revocs.d' created
gpg: revocation certificate stored as '/Users/peter/.gnupg/openpgp-revocs.d/3EC10657358FA236660286CFF27366682E13876D.rev'
public and secret key created and signed.


pub   rsa4096 2019-03-17 [SC]
      3EC10657358FA236660286CFF27366682E13876D
uid                      Homer Simpson <homer@simpson.com>
sub   rsa4096 2019-03-17 [E]
Great, now you have your own pgp keys, one private and one public. Don’t loose your keys and revocation key. Keep them in a safe place offline or at least put them in a key store e.g. KeePassXC and put that in the cloud.
List your keys in the gpg keyring and make sure everything looks ok.
$ gpg --list-secret-keys --keyid-format LONG


gpg: checking the trustdb
gpg: marginals needed: 3  completes needed: 1  trust model: pgp
gpg: depth: 0  valid:   1  signed:   0  trust: 0-, 0q, 0n, 0m, 0f, 1u
/Users/peter/.gnupg/pubring.kbx
-------------------------------
sec   rsa4096/F27366682E13876D 2019-03-17 [SC]
      3EC10657358FA236660286CFF27366682E13876D
uid                 [ultimate] Homer Simpson <homer@simpson.com>
ssb   rsa4096/7FD20308418E6C51 2019-03-17 [E]
Sign with the key
Time to test if we can sign with our key.
Run the following command:
$ echo "test" | gpg --clearsign
If you get following error:
gpg: signing failed: Inappropriate ioctl for device
gpg: [stdin]: clear-sign failed: Inappropriate ioctl for device
then you have to help gnupg to understand the terminal type. Run the following command:
export GPG_TTY=$(tty)
and try again. Don’t forget to add this variable to your rc-file, .bashrc, .zshrc etc. depending on your shell.
Now you will see the following:
┌────────────────────────────────────────────────────────────────┐
│ Please enter the passphrase to unlock the OpenPGP secret key:  │
│ "Homer Simpson <homer@simpson.com>"                            │
│ 4096-bit RSA key, ID F27366682E13876D,                         │
│ created 2019-03-17.                                            │
│                                                                │
│                                                                │
│ Passphrase: __________________________________________________ │
│                                                                │
│         <OK>                                    <Cancel>       │
└────────────────────────────────────────────────────────────────┘
Enter the correct Passphrase end press Enter. The following result will be displayed.
-----BEGIN PGP SIGNED MESSAGE-----
Hash: SHA256


test
-----BEGIN PGP SIGNATURE-----


iQIzBAEBCAAdFiEEm7ZX3p7Z5p+PkT9C2c8GCwZDq2UFAlyNZC4ACgkQ2c8GCwZD
q2UU6g//S0eGqWM/j1bF0SSs/JTLX8fG0ShAQ0LgpskejHMbljYVg9b1zioxbXIB
1fOVkT0eb047eVJJ9qLLTqcxoF+Nnt3lU4JgQ3n0sVkUxPttC14mMIYrd8admcIR
tK0yL4ouxWD5fI/QROv90gwe/vzs1IGEFvDrGmnaRGyGO2bASBUr5fypjeIjck5k
b+UUjES5vlywMuYUe6AZ5EBmwreKtTOqOHORWODlFtwqCndwPZWuw4AlsWVP/f+p
FGmYdt5pKZaNcesJ00i+oohcyJHETq1Nmjn/kEfDq5aLzn2Ko+jOInJLh4LbzbAf
KDZX2idDguStgvMemgvHRVbtsqZb3YkPm4z/bZg9xgynGUKBsAKejFPwcM9mHyAG
vNuk+Y4Tp6jGM/C9awN1IXAQMlpn2x6jKpk7fNdFy+/IIdyUjKYYTDQ4w246hq9P
i4bol3oJGQkIz8lmu1WhBQJpw/aacu5ZTVLyUDAIqY9HZ16a/3iZtoSCsr4FjK7g
5jXuRxo+rXw9EW5B28hsdEwJNLgkiC7qfMKlEvNJTPP4l/wRm681uIPbcqfxcSnd
5kH7E5spe0IxDW/5kzUWRKi9PShqtZxqGKeoLPIWLQ8ZOX+aAW+eGxL9T1+apel7
JhA8uWB8NFKfnTnm87chTBsyVj2UvNGKRC5P6yG2jSibpGFRfac=
=w3Yy
-----END PGP SIGNATURE-----
Store the passphrase in MacOS key-chain.
Since we are lazy and don’t want to enter our passphrase everytime, we can store it in the MacOS key-chain. To make that happen we have to install pinentry-mac, the Pinentry for GPG on Mac from GPGTools.
$ brew install pinentry-mac
We have to make gpg-agent use the new pinentry. Create the following file, if it doesn’t exist, ~/.gnupg/gpg-agent.conf
$ vim ~/.gnupg/gpg-agent.conf
and add the following line:
pinentry-program /usr/local/bin/pinentry-mac
then kill the gpg-agent and let it start again to load the new pinentry value
$ gpgconf --kill gpg-agent
Let’s sign again and make sure that we are using the new pinentry.
$ echo "test" | gpg --clearsign
and you will see the following graphical prompt.
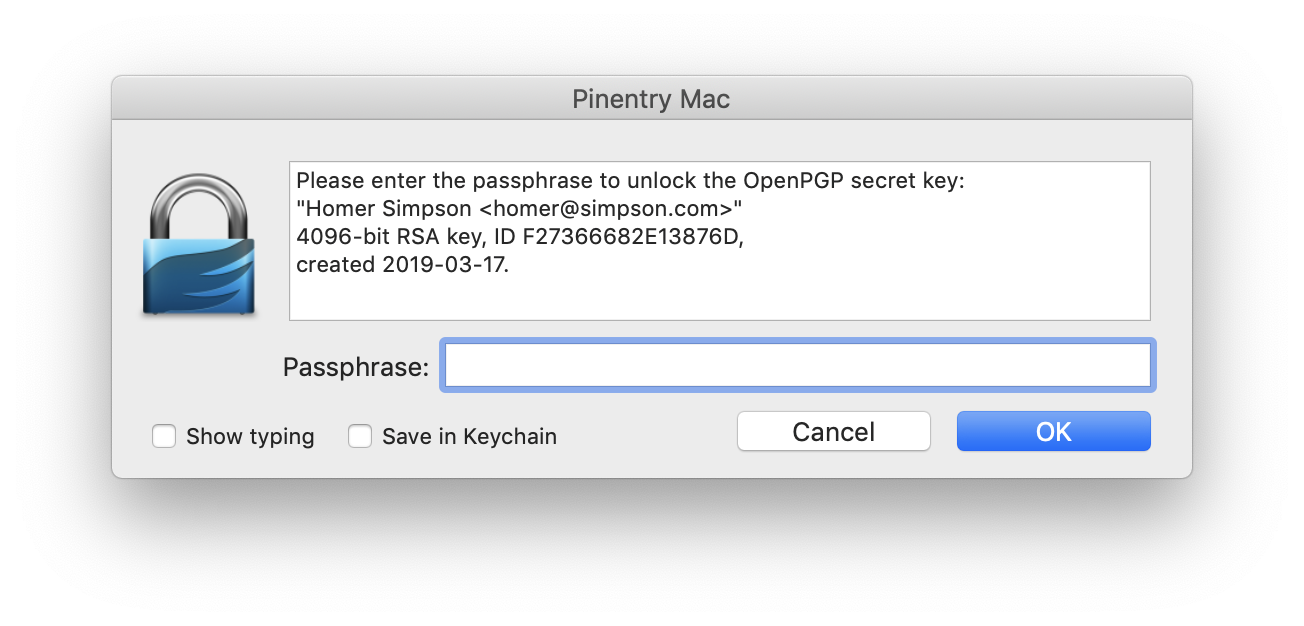 Enter your passphrase and check the
 Save in keychain checkbox and then press OK.
You will now see
-----BEGIN PGP SIGNED MESSAGE-----
Hash: SHA256


test
-----BEGIN PGP SIGNATURE-----


iQIzBAEBCAAdFiEEPsEGVzWPojZmAobP8nNmaC4Th20FAlyOobEACgkQ8nNmaC4T
h20Hqw/7B00TfC1ZbHTi7FHyF0+iAyUYox543exAQ10jT9plTGuLmN5udRGH+FU9
kTX6bVLDLJJPunXp59Dl/U0FopJTldS6YK+q7019yAmfDzShAMg0duL7jCMw+iYf
WPlggMgfXJHTA8w1pHG1VzC+QCHXUUS7cN+RHYVNzg+0Uawdf5jNDaTXaorRoCPt
kV76eSMN7XD8HjTSM6ujckqXBMAng4qx6Rt+OD/TRhgHJ1ahvPT+8IgediKf9/sh
nraHobem7KZhYSP3kFH6p4ecrlw9xhqqv9tj9ZXNbJiuEd3jXlPp8rud5qdIcOMv
9WJRUEJOmkPRysJYNEHN0jJC4t89EWhYh7BUyds8dWNwrIE2OIGKhxIeYDTHJ85d
lR4HmRbRfC2L0duhPD3qmJfC7q1BiEkLpipOCFV8r8lo0jls/eNI7BvO6pzZNW/t
O7C+RnpntNyTky8Z6eIWl6d4nR340sqZz0LIyV51JiA/wocfGN3BhVi9FXOw5FZ5
ADiwwfiQ+517kKGjAer9lA/8VTEgW2GflBDk90Z7K3jNpM7ReOhV9Cbk5T5V0BQc
m6WA4XOLf4wGtAgGk83XcnFRkurrm8oJRz/io1ij0n4/8RVgIc5UKDWSKmzsCYOs
A86iNfAAaUOP08N+fOA8sON0h3HKNof0gk2GhTCT+Ha9FV0nZTw=
=2QMt
-----END PGP SIGNATURE-----
and your passphrase is now saved in the MacOS key-chain.
Great, now it’s time to sign a commit.
Sign a commit
We have to tell git which key we want to use when signing. We can provide the key name when doing a commit but it’s much easier to add it to our config file. We can use the global ~/.gitconfig file or the .git/config file in the repository. We will use our global config file but it’s good to know that we can override that if needed in a specific project.
First we will list all keys:
$ gpg --list-secret-keys
/Users/home/.gnupg/pubring.kbx
-------------------------------
sec   rsa4096 2019-03-17 [SC]
      3EC10657358FA236660286CFF27366682E13876D
uid           [ultimate] Homer Simpson <homer@simpson.com>
ssb   rsa4096 2019-03-17 [E]
and select the key you want to use.
In our case it is 3EC10657358FA236660286CFF27366682E13876D so let’s add it to the global git config file.
$ git config --global user.signingkey 3EC10657358FA236660286CFF27366682E13876D
When signing a commit we have to use the ‘-S’ option.
$ git commit -S -m "our first signed commit"
we have now signed a commit with our private gpg key. You probable don’t want to remember to use the -S option every time you are making a commit and a little further down I will show you how to make it happen automagically.
If you get the following error
gpg: signing failed: No pinentry
gpg: [stdin]: clear-sign failed: No pinentry
try to restart the gpg-agent
$ gpgconf --kill gpg-agent
$ gpgconf --launch gpg-agent
We will now list the commit log to see if our commit is signed. We have to use the format placeholder %G? to see if it’s signed and the status of the signature.
From the manual:
%G?: show “G” for a good (valid) signature, “B” for a bad signature, “U” for a good signature with unknown validity, “X” for a good signature that has expired, “Y” for a good signature made by an expired key, “R” for a good signature made by a revoked key, “E” if the signature cannot be checked (e.g. missing key) and “N” for no signature
$ git log --pretty="format:%h %G? %aN  %s"
8474358 G Homer Simpson  our first signed commit
8fcf479 N Homer Simpson  initial commit
and as you can see, the first commit is not signed (N) but the second one is and it’s valid (G).
Sign a tag
When signing a tag we have to use the -s option, yes lowercase s.
Git supports two types of tags, lightweight and annotated, but we can only sign annotated tags. A lightweight tag is simply a name for an object (usually a commit object).
# a lightweight tag
$ git tag 1.0
# a signed tag
$ git tag -s 1.0-signed

$ git log --pretty="format:%h %G? %aN  %d %s"
8474358 G Homer Simpson   (HEAD -> master, tag: 1.0-signed, tag: 1.0) our first signed commit
8fcf479 N Homer Simpson   initial commit
Verify a commit or a tag
As you saw earlier we can list the commit log and see if a commit is signed and the status. We can also use the commands
‘git verify-commit’ and ‘git verify-tag’ to verify commits and tags, respectively.
$ git verify-commit 8fcf479
$ git verify-commit 8474358
gpg: Signature made Sön 17 Mar 20:55:18 2019 CET
gpg:                using RSA key 3EC10657358FA236660286CFF27366682E13876D
gpg: Good signature from "Homer Simpson <homer@simpson.com>" [ultimate]

$ git verify-tag 1.0
error: 1.0: cannot verify a non-tag object of type commit.

$ git verify-tag 1.0-signed
gpg: Signature made Sön 17 Mar 21:10:00 2019 CET
gpg:                using RSA key 3EC10657358FA236660286CFF27366682E13876D
gpg: Good signature from "Homer Simpson <homer@simpson.com>" [ultimate]
Automagically sign all commits and tags
We don’t want to remember to use the -S option every time we make a commit, instead we can add the commit.gpgsign flag to our git configuration.
$ git config --global commit.gpgsign true
As for commits, we don’t want to remember to add the -s option. Instead we will we add the tag.forceSignAnnotated flag to our git configuration.
$ git config --global tag.forceSignAnnotated true
Now when creating an annotated tag it will be signed. A lightweight will not and never will. Let’s try it. First create two tags, one ligtweight and one annotated.
$ git tag 2.0
$ git tag 2.0-signed -m "a automagically signed tag"
print the git log and view the tags.
$ git log --pretty="format:%h %G? %aN  %d %s"
0906857 G Homer Simpson   (HEAD -> master, tag: 2.0-signed, tag: 2.0) a automagically signed commit
8474358 G Homer Simpson   (tag: 1.0-signed, tag: 1.0) our first signed commit
8fcf479 N Homer Simpson   initial commit
and verify the tags.
$ git verify-tag 2.0
error: 2.0: cannot verify a non-tag object of type commit.

$ git verify-tag 2.0-signed
gpg: Signature made Mån 18 Mar 08:51:40 2019 CET
gpg:                using RSA key 3EC10657358FA236660286CFF27366682E13876D
gpg: Good signature from "Homer Simpson <homer@simpson.com>" [ultimate]
As you can see, the ligtweight tag is not signed but the annotated is.
If you are using the -a option when creating annotated tags, don’t do that because it will take precedence over tag.forceSignAnnotated option and the tag will not be signed.
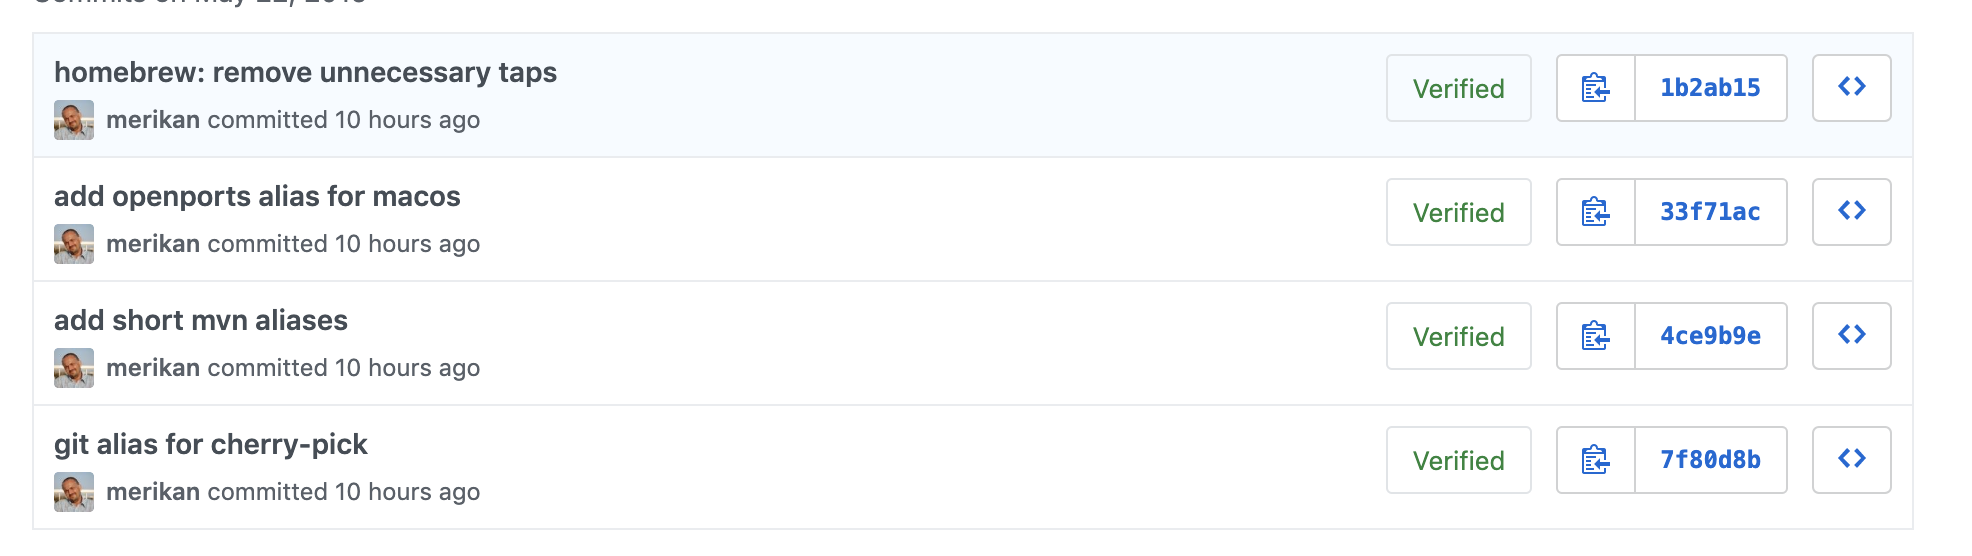
Signature verification on Github, Gitlab and Bitbucket
If you add your public key to your github and gitlab account it will recognize and verify your signed commits and tags. Bitbucket does not have that feature.
Sign old commits
You can not really sign old commits because we will make new commits. If that is ok and you don’t share the repository this is how to do it.
You can update all commits with the rebase git command.
warning: this will make new commits so don’t do this if you are sharing this repository.
$ git rebase --exec 'git commit --amend --no-edit -n -S' -i --root
--exec will execute the command after every commit down to root (--root)
Wrap up
We installed gnu-pg and pinentry-mac.
We created our first pgp key with gpg --full-generate-key.
We added to the git configuration, which key to use and also that we want to sign commits and tags automagically.
The .git_config file will look like this.
[user]
  name = Homer Simpson
  email = homer@simpson.com
  signingkey = 3EC10657358FA236660286CFF27366682E13876D
[commit]
  gpgsign = true
[tag]
  forceSignAnnotated = true
That’s it. Until next time, take care and remember, you are best.
comments powered by Disqus